I like to think of Alaska wildlife photography as a long conversation with patience, light, and one very stubborn moose.
If you are planning a trip north, you probably have the same four questions I do before every shoot: Where do I look? What lens do I bring? How close is too close? And the sneaky fifth one: How do I come home with good photos instead of just a full memory card?
“You don’t take a photograph, you make it.”
Ansel Adams
The problem in Alaska is not a lack of subjects. The problem is that wildlife, weather, and light all seem to have opinions. That is why I keep two official resources close at hand: the Alaska Department of Fish and Game’s wildlife photography guide and the National Park Service wildlife safety guidance. One helps with technique, the other keeps the encounter respectful, which is the whole game in the first place.
By the end of this guide, you will know where Alaska’s most photogenic wildlife usually shows up, which camera settings are a sensible starting point, how to photograph ethically, and how to plan a field day that actually leaves room for the unexpected. That is the boring magic. The rest is timing.
Wildlife terms that make the day less chaotic
Before I start talking about lens choices and shutter speed, I like to translate a few terms. Photography gets easier when the jargon stops acting like a velvet rope at the door.
Best locations for wildlife shots
Alaska is a place where the map matters, but the map is never the whole story. The best wildlife photos usually happen where habitat, food, and a little human patience overlap. When I think about a photo route, I start with open water, river corridors, alpine edges, wetlands, and places where animals already like to travel. That is the mental shortcut that saves me from wandering around like a confused tourist with a telephoto lens.
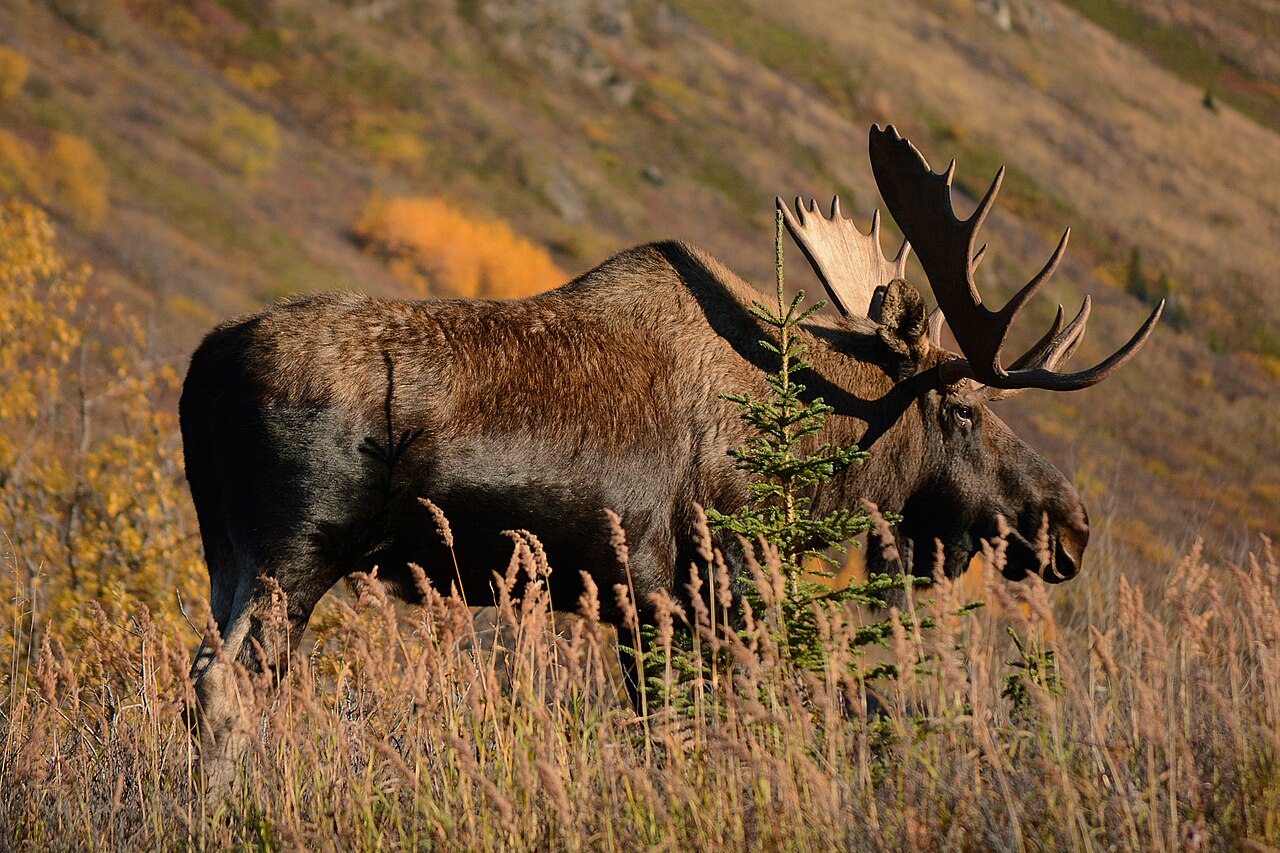
For a deeper regional sense of where animals and photographers often overlap, the National Park Service’s Denali wildlife-viewing page is a useful example of how productive a single landscape can be. The Alaska Department of Fish and Game also keeps a practical photography guide for Alaska wildlife that reinforces the same lesson: know the animal, know the habitat, and do not treat the animal like a background prop.
I also like to think in routes instead of single spots. One morning might start with river habitat, move to an alpine edge by lunch, and finish with shoreline birds if the weather plays fair. That flexibility matters because Alaska rewards people who can pivot without sulking. If you are pairing the trip with a guided wilderness experience, the services overview is the place to see how broader trip planning fits around hunting, fishing, and remote access options.
Field notes for four common Alaska subjects
One of the easiest ways to stop overthinking a wildlife day is to stop thinking about wildlife as one giant category. A moose, a bear, an eagle, and a caribou all ask for different timing. Same camera. Different rhythm. Different kind of patience. That is the part I like best, because it turns a vague mission into a very practical one.
Moose: big body, soft background, slow drama
Moose are generous subjects if you give them room. They are big enough to carry the frame, but they can vanish into brush or water if you crowd the composition with too many foreground distractions. I like a slightly lower shooting angle when possible, then I wait for the head or antlers to clear the tallest grass. If the animal is moving, I keep the shutter speed high enough to preserve the legs and the muzzle, because a sharp face saves a photograph that would otherwise feel like a note in a diary.
For a moose, the background is almost always part of the story. A wide patch of water, a willow thicket, or a clean line of tundra does the heavy lifting. If the background is tangled, I nudge the lens longer or shift my position a few feet instead of hoping luck will tidy the scene. Luck is not a reliable assistant.
Bears: distance first, frame second
Bear photography is a lesson in self-control with a camera attached. The best frame is the one where the bear is relaxed, not the one where the photographer got greedy. I keep the longest practical lens on hand, track the bear’s behavior, and wait for a moment when the head turns, the ears lift, or the animal pauses in a believable way. If the bear starts scanning because of me, I have already made the scene worse.
Salmon streams and berry slopes can offer wonderful bear photos, but they also tempt people into sloppy decisions. The solution is not heroics. The solution is an angle, a clean perch, and the patience to let the animal keep acting like itself. A good bear image should still look like the bear came first.
Eagles and other birds: pre-focus, then pounce
Birds are the quick-change artists of Alaska. They arrive, disappear, and pivot without consulting my plans. The trick is to set up before the action. I watch the perch, the shoreline, or the likely takeoff path and pre-focus on that zone. Then I wait for the wing spread, the landing, or the launch. Burst mode helps here, but only for a short, meaningful sequence. I do not spray the sky because I am nervous; I use the burst because the moment is genuinely brief.
Birds also reward a little restraint in composition. Leave some space in front of the direction of travel. If the bird is gliding against water or cloud, a darker or simpler background makes the subject easier to read at a glance. That is useful because a bird photo often lives or dies in the first two seconds of attention.
Caribou and sheep: let the landscape do its job
Caribou and Dall’s sheep are the subjects that remind me Alaska is as much about scale as it is about animals. I do not always want a tight portrait here. Sometimes the strongest image is a small animal crossing a huge slope or a line of caribou moving across open tundra. Letting the terrain stay visible keeps the photo honest. It says where the animal lives, not just what it looks like.
For these subjects, I often prefer a slightly wider frame than I would use for moose or bear. That gives the viewer enough room to feel the wind, distance, and elevation. If the animal group is moving, I pick one clean line of movement and wait for the line to separate from the rest. It sounds small, but in a place this big, small choices become the whole frame.
Here is the day-pack version of that same thinking:
- One primary lens you trust rather than three lenses you keep second-guessing.
- Lens cloths and weather protection because Alaska likes mist, spray, and surprise drizzle.
- Extra battery and card space so the trip is not ruled by a blinking icon.
- A small notebook or phone note to record what species, light, and location worked best.
- Food and water because concentration gets sloppy when the human part of the camera team runs out of fuel.
That is the real pattern: know the subject, know the light, know your gear, and leave enough mental space to notice when the scene changes. Alaska is generous, but it is not interested in doing the thinking for you.
Camera settings and techniques
This is the section where people usually want a magic number. Sorry. Alaska does not hand out magic numbers; it hands out changing weather and strong opinions about distance. Still, a few starting points make life much easier.
1. Start with shutter speed, then build the rest
For big stationary animals in soft light, I am comfortable beginning around 1/500 to 1/1000. For birds in motion or anything that may move suddenly, I want 1/1250 or faster if the light allows it. The exact number depends on the lens, the action, and how much blur you are willing to keep. A fur texture can look lovely with a tiny bit of motion; a wing tip can look like a smear if you get greedy.
2. Use aperture to separate the subject from the mess
Wild Alaska backgrounds are often glorious and chaotic at the same time. Wide or moderately wide apertures, such as f/4, f/5.6, or f/6.3, help pull the animal forward. If the background is already simple, I may stop down a little more for depth of field. The trick is to decide whether the background deserves to be part of the story or just part of the scenery.
3. Let ISO save the moment, not ruin it
Modern cameras handle higher ISO better than older gear, and Alaska often asks for that flexibility. I would rather have a slightly grainier sharp photo than a clean blur. If the light gets moody, raise ISO until your shutter speed is still usable, then check the histogram and move on. The camera is a tool, not a moral test.
4. Focus on the eye whenever you can
A sharp eye gives the photo a pulse. Single-point autofocus or eye-tracking can work beautifully if the subject is obvious and the animal is still enough to cooperate. When the subject is moving through grass or brush, back-button focus makes it easier to keep tracking without the camera second-guessing you every time a twig gets dramatic.
5. Shoot bursts only when something is happening
Burst mode is not a personality trait. It is a tool for a takeoff, a head turn, a jump, or a quick interaction between animals. Use it when the behavior is changing. Otherwise, keep your rhythm slower and more deliberate. Card space is cheap; attention is expensive.
For a more formal field guide, the Alaska Department of Fish and Game’s PDF Photographing Wildlife in Alaska is worth a look. It is old-school in the best way: practical, specific, and more interested in useful guidance than in sounding glamorous. That is exactly the vibe I want when I am packing a camera bag for Alaska.
Ethical photography practices
This part is not a footnote. It is the whole foundation. If the animal changes behavior because I wanted a better frame, I am too close. If I am making noise, feeding wildlife, or drifting toward a den or nest to get a cleaner composition, the picture stopped being worth it a while ago.
The National Park Service keeps the rules plain: do not approach or follow wildlife, do not feed animals, and keep serious distance. In Alaska park country, that means staying far back from bears and maintaining respectful space from other wildlife as well. The spirit is simple even when the numbers differ by species and situation: let the animal stay wild. If you want the exact public guidance, read the Alaska wildlife safety page from NPS before your trip.
- Use the longest practical lens before you move closer.
- Keep your voice down and your body language calm.
- Do not bait, call, or crowd animals for the sake of a frame.
- Leave the den, nest, or calf alone if your presence changes the scene.
- Back away if the animal stops feeding, scanning, or resting normally.
I also try to remember that Alaska’s best wildlife moments often arrive because the photographer was willing to wait, not because the photographer was willing to bulldoze the moment. That is a useful ego check. The camera is there to witness, not to negotiate with a moose.
Plan your shoot like a small expedition
Good wildlife photos usually come from ordinary preparation repeated with unreasonable consistency. I like a simple sequence: pick the region, check the season, think about the likely species, decide where the light will matter most, and then build a short gear list around that reality instead of the fantasy version where every animal politely poses under a gold-filtered sky.
- Choose one or two target species. If I try to photograph everything, I photograph nothing well.
- Match the place to the subject. Rivers for salmon and eagles, wetlands for moose, open country for caribou, shorelines for seabirds.
- Pack for the weather you expect and the weather that will bully you. Alaska likes layers, dry bags, lens cloths, and backup power.
- Arrive early and stay flexible. The light changes faster than your best spreadsheet.
- Leave room for a guided day. If the trip is part photography and part broader wilderness travel, the right local plan can save a lot of wandering.
If you want to tie wildlife viewing into a broader Alaska trip, the services page is the best place to start. If you want more reading before you book anything, browse the blog for additional planning notes and outdoor trip ideas. If a guide service or small content team needs to sort travel notes, shot lists, and booking reminders without turning the whole thing into a spreadsheet carnival, a resource like AI consulting services can help figure out where automation actually fits. That way the camera does not become the only thing doing homework.
What guests usually say after a good Alaska day
These are the kinds of notes that matter to me more than a perfect histogram. They are the little signs that the trip felt organized, calm, and worth the cold toes.
“The best part was how unhurried the day felt. We had time to wait for the shot instead of rushing past it.”
“I came home with better photos because somebody helped me read the light before I started firing away.”
“The wildlife felt close enough for great pictures, but never close enough to feel like we were bothering it.”
That balance is the goal: good images, calm pacing, and a wildlife encounter that still feels like Alaska afterward, not like a bad decision with a telephoto lens.
Conclusion
If I had to compress Alaska wildlife photography into one sentence, it would be this: the animal is the subject, the landscape is the stage, and patience is the camera setting that never appears in the menu. The more carefully you read the habitat, the more naturally the photos come together.
- Use habitat, not guesswork, to choose where to shoot.
- Start with shutter speed, then tune aperture and ISO around the light.
- Keep the encounter ethical so the animal stays wild and the photo stays honest.
- Build the day around preparation, not panic.
If you are ready to turn a trip idea into something more concrete, start with guided trip planning or head back to the blog for more practical Alaska notes. The camera will do better when the rest of the plan stops improvising.